The new Default Template feature
As part of our recent server maintenance, we’ve added a great new Default Template feature. This feature allows you to set which template List Perfectly will default to each time you create a new listing in your List Perfectly Catalog.
So, let’s say you’re listing a bunch of jeans. You can select a Jeans template as the default template and this template will automatically pop up with each new listing, allowing you to create each jean listing with fewer clicks. When you finish listing your jeans and want to move on to sneakers, make a sneaker template the new default and continue listing.
Templates are useful for carrying over all the information you need to include in each listing, including information like brand, color, zip code, cost of goods, and more, no matter what you’re listing. Using the default template feature helps speed up your workflow and work more efficiently because you save time with fewer clicks and typing.
All plans have access to this new feature.
You can also create and manage templates entirely on your mobile device. On your mobile device, visit app.listperfectly.com from your mobile browser and follow the same steps as shown on the desktop.
Creating a template
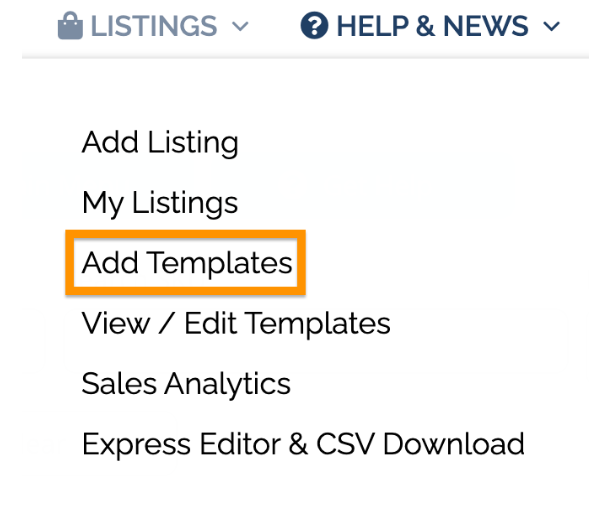
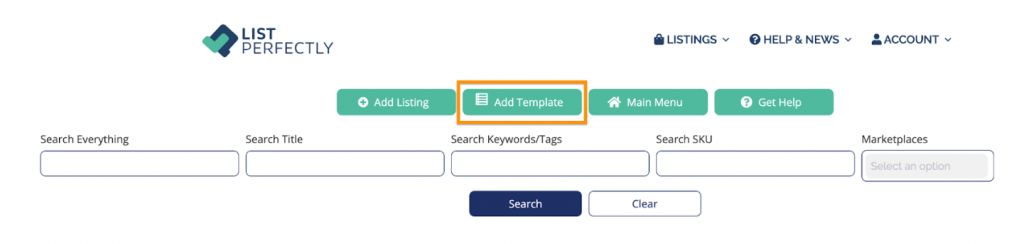
You can create new templates by:
- Clicking on “Add Templates” from the Listings menu at the top of the page
- Clicking on the “Add Template” button at the top of your List Perfectly Catalog
Working with templates
To work with templates, first, add or edit a listing in your List Perfectly Catalog.
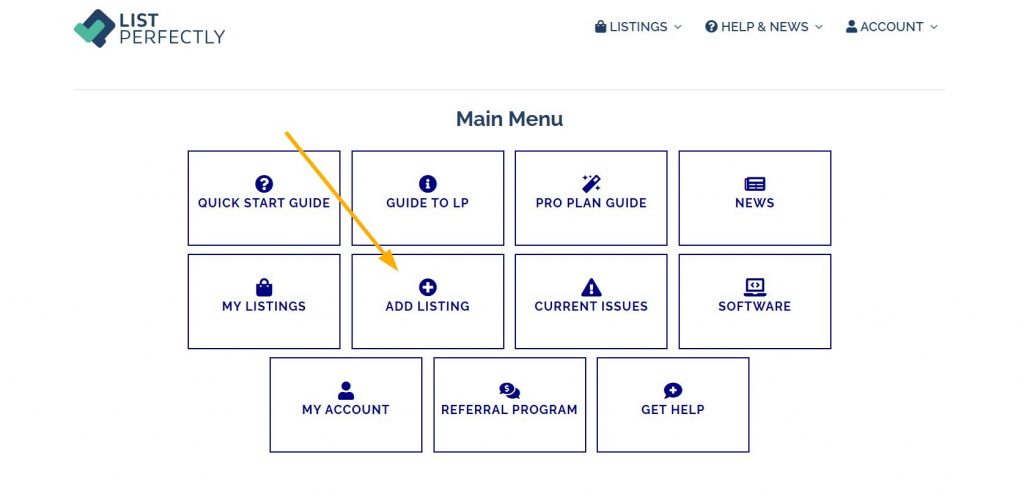
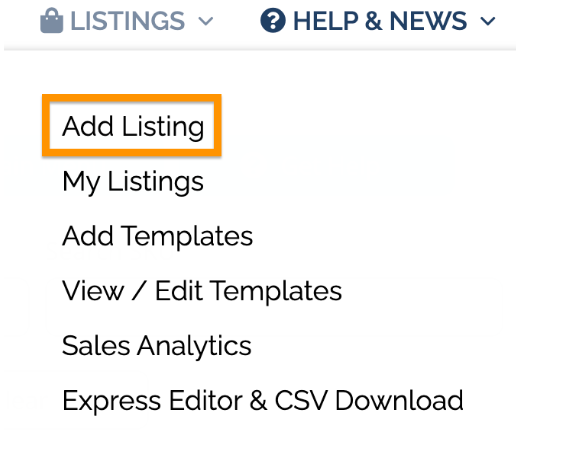
From the List Perfectly Catalog, you can:
- Go to the top of the page and click on the “Add Listing” button
- Go to the listing you want to edit and click on the “Edit” icon

From the the Listings menu at the top of the page: Click “Add Listing”.
Applying a template to a listing
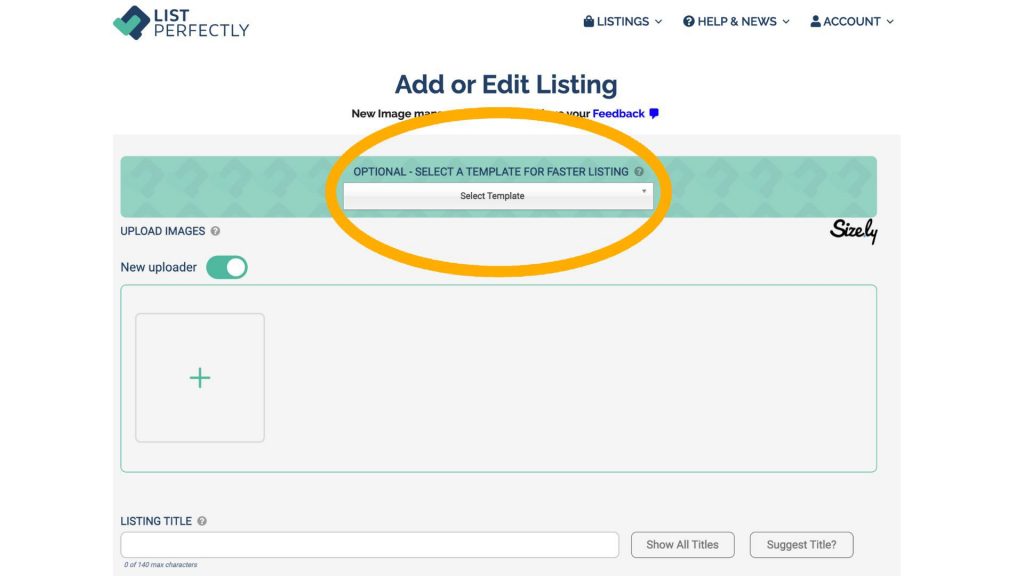
To apply a template to a listing, look to the top of the Add or Edit Listing page and go to the “Select a Template for Faster Listing” section.
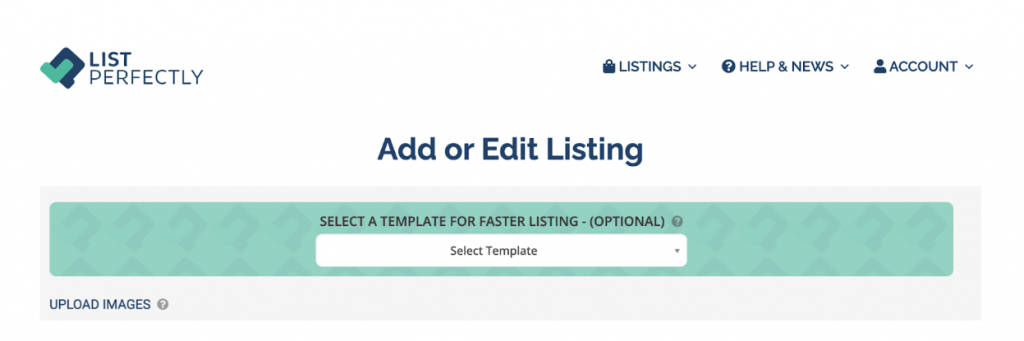
You’ll see a drop-down menu of all of your List Perfectly Templates. Scroll and search for your desired Template. Then, click the Template you’d like to use and the template will be applied to your listing. Upload images and complete the remaining fields and information, and then click “Save and Exit to Catalog” or “Save and New” to add your listing to your LP Catalog.
Setting a template as default
Once you have at least one saved template, you can set it to apply each time you create a new listing, with no need to select from a dropdown. This is useful if you have the repeated information you want to be applied to every listing, or if you are working on a batch of similar items and want the same template applied for that batch as in our jeans and sneakers examples above.
Default templates can be changed at any time.
From the the Listings menu at the top of the page: Click “View/Edit Templates”.
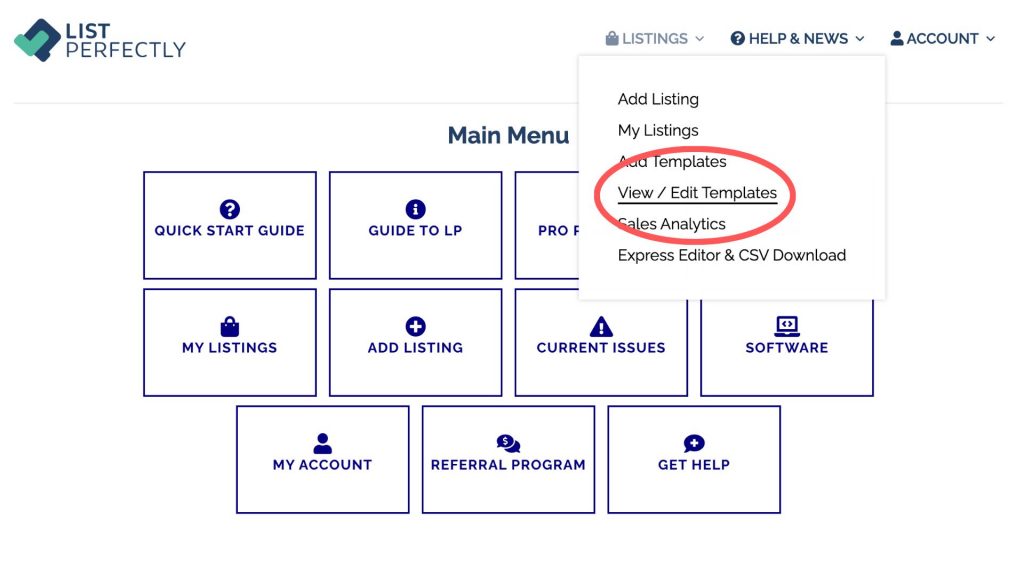
When you arrive at the View / Edit Templates page, you’ll see a column titled Default Template.
Select the template you’d like to use as your default.
To remove a default template, just unselect the checkbox and the template will no longer be automatically applied.

For more information on applying a template when listing, check out this demo.
We hope you enjoy the new default templates feature! Let us know what you think in the List Perfectly Facebook Group!
More details on templates and default templates can be found in our guide here.